CI/CD in Node.js with Google Cloud Build
Run Node.js CI/CD in Google Cloud Build with an encrypted .env.vault file
Find a complete code example on GitHub for this guide.
Initial setup
Install the gcloud cli.
brew install --cask google-cloud-sdk
Log in to gcloud.
gcloud auth login
Set your project. You can look this up on the Google Cloud Dashboard.
gcloud config set project PROJECT_ID
Initialize your project with Google Cloud.
gcloud init && git config credential.helper gcloud.sh
Create a repo.
gcloud source repos create hello-gcloud
Create a build.js file. It's a very simple build script that outputs 'Hello World'.
build.js
// build.js
console.log(`Hello ${process.env.HELLO}`)
Create a package.json file.
package.json
{
  "scripts": {
    "build": "node build.js"
  }
}
Create a cloudbuild.yml file.
cloudbuild.yml
# cloudbuild.yml
steps:
- name: node
  entrypoint: npm
  args: ['install']
- name: node
  entrypoint: npm
  env:
    - 'DOTENV_KEY=${_DOTENV_KEY}'
  args: ['run', 'build']
Commit that to code and push to Google Cloud.
git push google
Once pushed, the Google Cloud Build build will say 'Hello undefined' as it doesn't have a way to access the environment variable yet. Let's do that next.
There were more steps to fully connect up Google Cloud Build that we did not discuss above. It's a bit of a mess to be honest. If you can we would recommend GitHub Actions over it. But once you get Google Cloud Build going it runs quite well.
Install dotenv
Install dotenv.
npm install dotenv --save # Requires dotenv >= 16.1.0
Create a .env file in the root of your project.
.env
# .env
HELLO="World"
As early as possible in your application, import and configure dotenv.
build.js
// build.js
require('dotenv').config()
console.log(process.env) // remove this after you've confirmed it is working

console.log(`Hello ${process.env.HELLO}`)
Try running it locally.
node build.js
{
  ...
  HELLO: 'World'
}
Hello World
Perfect. process.env now has the keys and values you defined in your .env file.
That covers local simulation of the CI. Let's solve for the real CI environment next.
Build .env.vault
Push your latest .env file changes and edit your CI secrets. Learn more about syncing
npx dotenv-vault@latest push
npx dotenv-vault@latest open ci
Use the UI to configure those secrets per environment.
Then build your encrypted .env.vault file.
npx dotenv-vault@latest build
Its contents should look something like this.
.env.vault
#/-------------------.env.vault---------------------/
#/         cloud-agnostic vaulting standard         /
#/   [how it works](https://dotenv.org/env-vault)   /
#/--------------------------------------------------/

# development
DOTENV_VAULT_DEVELOPMENT="/HqNgQWsf6Oh6XB9pI/CGkdgCe6d4/vWZHgP50RRoDTzkzPQk/xOaQs="
DOTENV_VAULT_DEVELOPMENT_VERSION=2

# ci
DOTENV_VAULT_CI="x26PuIKQ/xZ5eKrYomKngM+dO/9v1vxhwslE/zjHdg3l+H6q6PheB5GVDVIbZg=="
DOTENV_VAULT_CI_VERSION=2
Set DOTENV_KEY
Fetch your CI DOTENV_KEY.
npx dotenv-vault@latest keys ci
# outputs: dotenv://:[email protected]/vault/.env.vault?environment=ci
Set DOTENV_KEY on Google Cloud Build.
Build CI
Commit those changes safely to code and rerun the build.
That's it! On rerun, your .env.vault file will be decrypted and its CI secrets injected as environment variables – just in time.
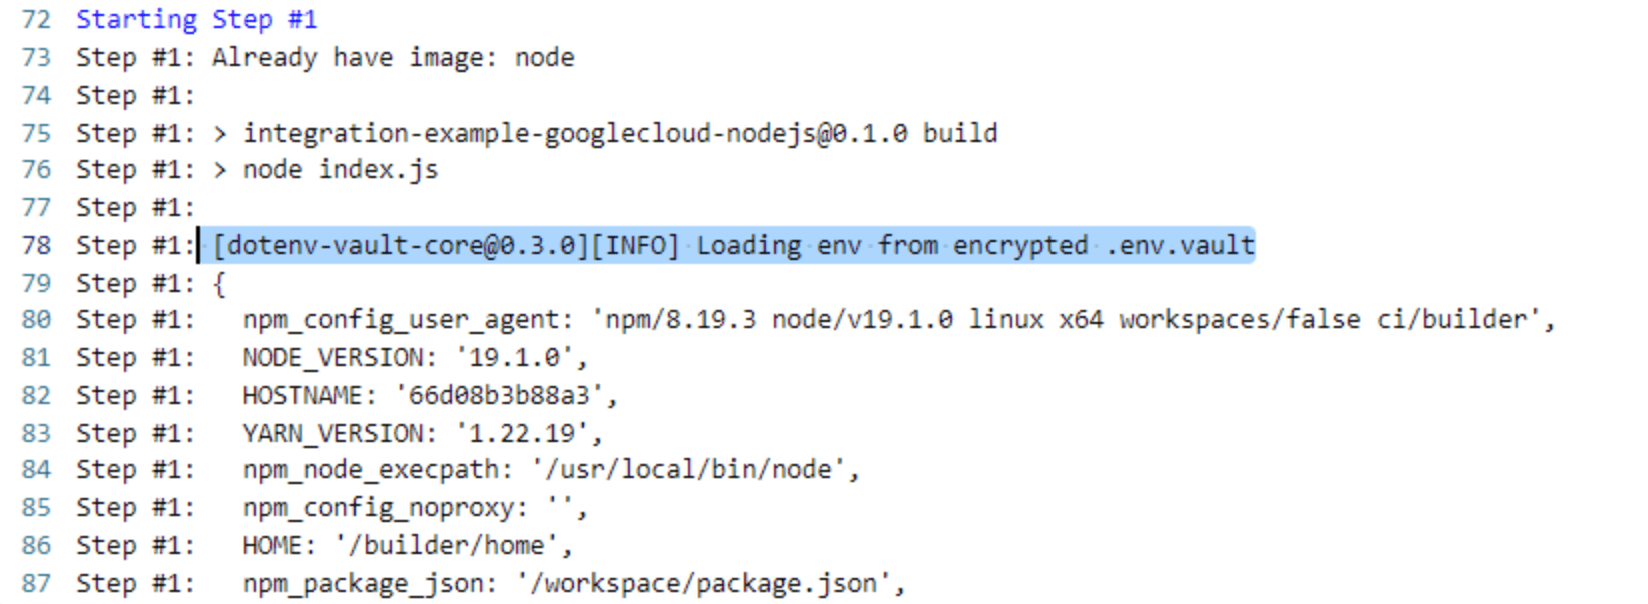
You'll know things worked correctly when you see 'Loading env from encrypted .env.vault' in your logs. If a DOTENV_KEY is not set (for example when developing on your local machine) it will fall back to standard dotenv functionality.
You succesfully used the new .env.vault standard to encrypt and deploy your secrets. This is much safer than scattering your secrets across multiple third-party platforms and tools. Whenever you need to add or change a secret, just rebuild your .env.vault file and redeploy.